
MFA (Multi-Factor Authentication) is any security implementation that requires more than one method of authentication from independent categories of credentials, which are used to verify a user’s identity. The main purpose is to make it more difficult for an unauthorized person to access network resources, if one factor is compromised or broken, the attacker still has at least one more barrier to breach before successfully breaking into the target. Azure MFA is a way of safeguarding access to your data and applications in the Microsoft Azure cloud. MFA strengthens the user authentication process with several verification options like a phone call, text message, or mobile app notification.
If you’d like to learn more about Multi-Factor Authentication, check out our previous post that dives deeper into the topic.
Below are best practices on how to implement Azure MFA on a MyCloudIT RDS deployment. Let’s get started!
Office 365 Integration
For Azure MFA to work, your Active Directory must be synchronized with an Office 365 account. Click here to access our User Guide to learn how to sync your Office 365 Active Directory to an RDS deployment, if you haven’t done so already.
MFA Licenses
If your Azure Active Directory does not have Azure Multi-Factor Authentication enabled, you will need to purchase a plan that enables the feature on your tenant. The following steps detail how to activate Azure MFA on your Azure account.
- Log in to the Azure portal (https://portal.azure.com/).
- On the left blade, select Azure Active Directory.
- On the Azure Active Directory box, under Security, click on MFA Server

- On the Overview page, click Get Free Premium Trial

- You will see the available plans that provide Azure MFA on your tenant

- Choose the option that works best for your organization. You have the option to activate a free 30-day trial before you subscribe to the paid offer.


Enable Azure MFA for AD users
Once you have acquired a plan that provides Azure MFA, you need to specify the users that you will leverage MFA. You may come back to this section later, before testing the solution.
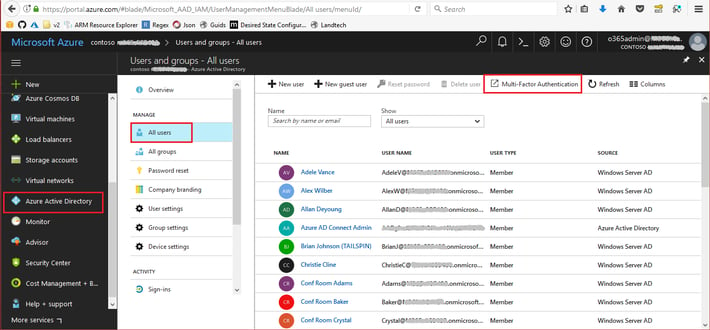
- On your Azure portal, in the Azure Active Directory page, select Users and groups. Then click All users.
- In the Users and groups page, click Multi-Factor Authentication.
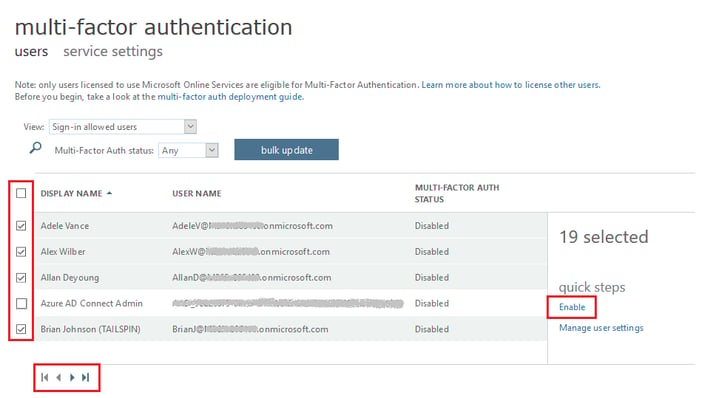
- On the new browser tab, select the users that you want to have MFA enabled. You may select some or all the users. Depending on the total number of users, there may be more than one page of users.
- Once you have selected the users, click Enable.
- On the About enabling multi-factor auth dialog box, click enable multi-factor auth.
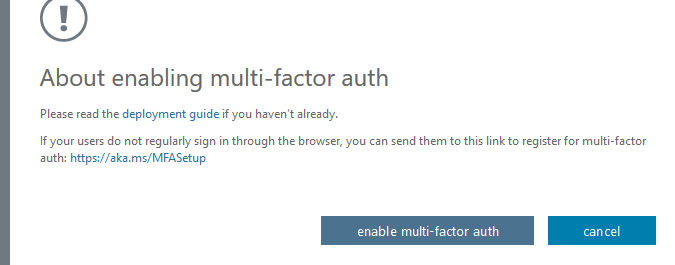
- Click Close on the dialog box.


After MFA has been activated for your users, they will have to set up the MFA settings before they can connect to remote resources using their Azure accounts. You will have to distribute the setup link, which can be found here [https://aka.ms/MFASetup], to all the MFA-enabled users.
Client account set up for MFA
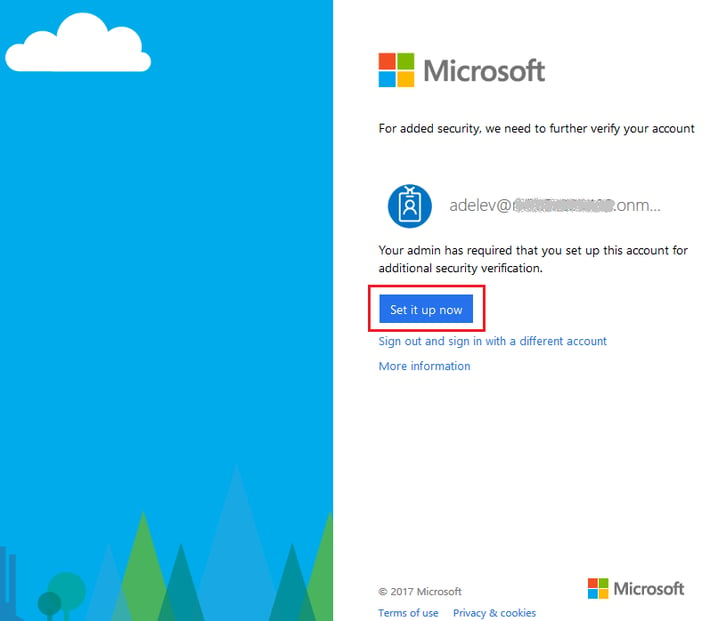
When a user uses the MFA setup link, they will be redirected to a page to set up additional security verification for their account.
- Go to the link https://aka.ms/MFASetup. If the shown credentials are not the ones you intend to use, then click Sign out and sign in with a different account.
- Click Set it up now.
- On the step How should we contact you?, select the option that best accommodates your needs and follow the instructions.

NPS server creation
The integration of an RDS infrastructure with Azure MFA requires the presence of a Network Policy Server (NPS). The NPS safeguards Remote Authentication Dial-In User Server (RADIUS) client authentication using Azure’s cloud-based MFA authentication. It also defines a central location for the management and control of network requests like Authentication, Authorization and Accounting (AAA) using policy sets.
In this section we will cover three steps:
- Virtual machine creation, required to host the NPS role.
- NPS role installation.
- NPS extension for Azure installation.
1. Virtual machine creation
As a best practice, it is recommended that in production environments, the NPS role should be installed on a separate server. You should avoid adding the NPS role to the RD gateway or RD connection broker servers.
NOTE: if you want to provide high availability then at least two servers must be created and configured for this purpose.
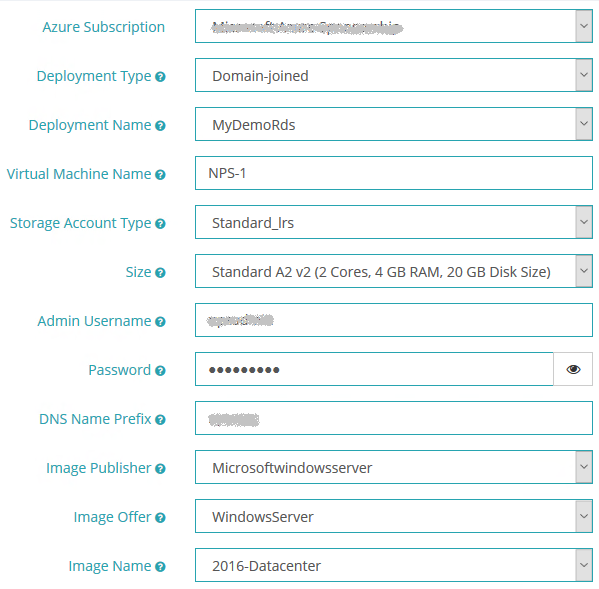
You can use the MyCloudIT portal to easily create a new domain-joined VM attached to your RDS deployment. From within the MyCloudIT portal, Go to Marketplace > Virtual Machines > Microsoft Windows Server. Once the provisioning process loads, select the Azure subscription with your RDS deployment >. Select Domain-Joined for deployment type >, then select your RDS deployment. Complete the rest of the form based on your preferences.
- On the Azure Subscription field, select the subscription that contains your RDS deployment.
- On the Deployment Type field, select Domain-Joined.
- On the Deployment Name field, select your RDS deployment.
- On the Storage Type field, we recommend you use Standard_LRS since there is no need for premium storage on this VM.
- Select WindowsServer in the Image Offer
- Select 2016-Datacenter in the Image Name
- Complete the provisioning form based on your preferences.
Once the form has been completed, click Continue until you reach the Confirmation page. Once you are there, agree to the terms and conditions, and then click Submit. A new notification event will show up on the top right corner of your browser letting you know that the VM creation task is running, it will take 15-20 minutes to create your new VM.
2. NPS role installation
After the VM creation process has finished, connect to your deployment using an AD administrator account.
NOTE: if your deployment only contains RemoteApp collections with published applications, then you won’t be able to log in to a published desktop.
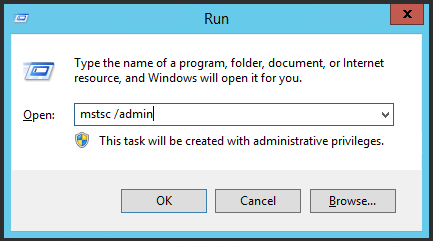
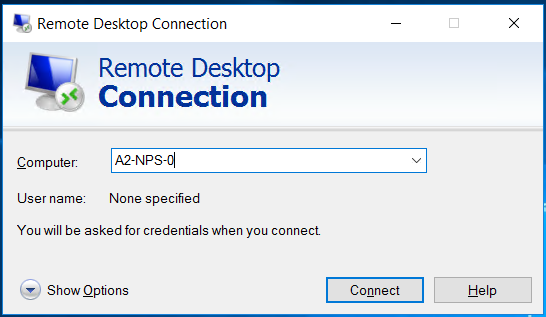
Instead try remoting in directly to the RD management server. Once you have connected to either a desktop or the management server, you will have to remote into the newly created VM using one of your AD Domain administrator accounts. Press Win + R to open the Run program > type mstsc /admin and press enter to access the Remote Desktop Connection program > type the VM name in the Computer field > click Connect.
The next steps will install the NPS role in your new server:
- Open Server Manager and click Manage, then click Add Roles and Features.
- On the Before you begin page, click
- On the Select Installation Type page, click Role/Feature Based Install and then click
- On the Select destination server page, click Select a server from the server pool, click the name of the new server where you want to install NPS, then click Next.
- On the Select Server Roles page, click Network Policy and Access Services, and then click Next three times. On the Select role services page, click Network Policy Server, and in the Add Roles and Features Wizard dialog box, verify that Include management tools (if applicable) is selected, click Add Features, and then click Next.
- On the Select features page, click .NET Framework 3.5 Features, then click Next.
- On the Confirm installation selections page, click Install.
- Installation will take a few minutes to complete. On the Installation Results page, verify that the installation was successful, and then click Close.
- Don’t log off or disconnect from the NPS server, since you will be needing it again very soon.
3. NPS extension for Azure installation
As a part of the configuration of the NPS extension, you need to supply admin credentials and the Azure AD ID for your Azure AD tenant. The following steps show you how to get the tenant ID:
3.1. Get Azure AD ID
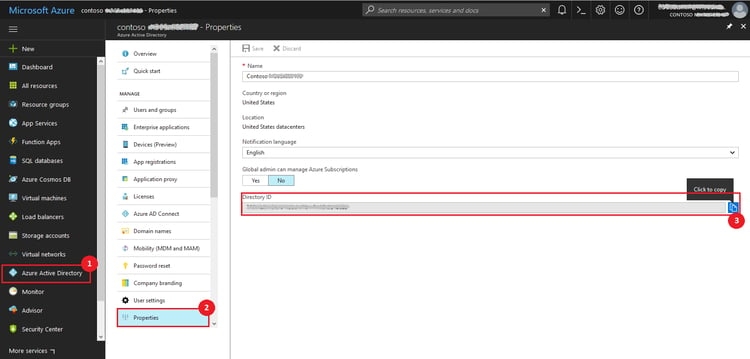
- Sign in to the Azure portal (https://portal.azure.com) as the global administrator of the Azure tenant.
- In the left navigation, select the Azure Active Directory
- Select Properties.
- In the Properties blade, beside the Directory ID, click the Copy icon, as shown below, to copy the ID to clipboard.
3.2. Install the NPS extension
- Download the NPS extension from this website.
- Copy the setup executable file to the NPS server.
- On the NPS server, double-click the executable. If prompted, click Run.
- In the NPS Extension for Azure MFA dialog box, review the software license terms, check I agree to the license terms and conditions, and click Install.
- On the NPS Extension for Azure MFA dialog box, click Close.
3.3 Configure certificates for use with the NPS extension
In this step, you need to configure certificates for the NPS extension to ensure secure communications. The NPS components include a Windows PowerShell script that configures a self-signed certificate for use with NPS.
This script performs the following actions:
- Creates a self-signed certificate
- Associates public key of certificate to service principal on Azure AD
- Stores the cert in the local machine store
- Grants access to the certificate’s private key to the network user
- Restarts Network Policy Server service
NOTE: if you want to use your own certificates, you need to associate the public key of your certificate to the service principle on Azure AD, and so on.
To use the script, provide the extension with your Azure AD Admin credentials and the Azure AD tenant ID that you copied earlier. Run the script on each NPS server where you installed the NPS extension. Then do the following:
- Open an administrative Windows PowerShell prompt.
- Execute the command cd ‘c:\Program Files\Microsoft\AzureMfa\Config’.
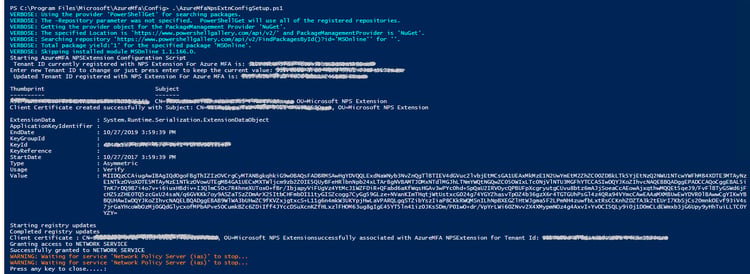
- Execute the command .\AzureMfaNpsExtnConfigSetup.ps1. the script checks to see if the Azure Active Directory module is installed, if not, the script installs the module for you.
- After the script verifies the installation of the PowerShell module, it displays the Azure Active Directory PowerShell module dialog box. In the dialog box, enter you Azure AD admin credentials and password, and click Sign In.
- When prompted, paste the tenant ID you copied to the clipboard earlier, then press Enter.
- The script creates a self-signed certificate and configures this portion of NPS. The output should be similar to the image shown below.
Configure NPS components on RD Gateway server
Once you have an NPS server running on your RDS environment, you need to configure the RD Gateway connection authorization policies to work with the NPS server. The authentication flow requires that RADIUS messages be exchanged between the RD Gateway and the NPS server. This means that RADIUS client settings must be configured on both RD Gateway and NPS server.
1. Configure RD Gateway connection authorization policies to use a central store
Remote Desktop connection authorization policies (RD CAPs) specify the requirements for connecting to a RD Gateway server. By default, RD CAPs are stored locally, and MFA requires that they be stored in a central RD CAP store that is running NPS. Follow the steps below to configure the use of a central store.
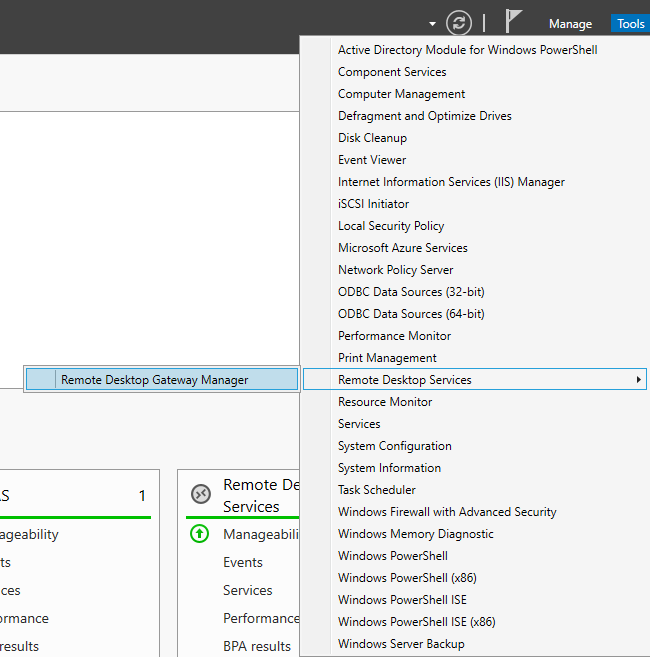
- On the RD Gateway server, open Server Manager.
- On the menu, click Tools, point to Remote Desktop Services, and then click Remote Desktop Gateway Manager.
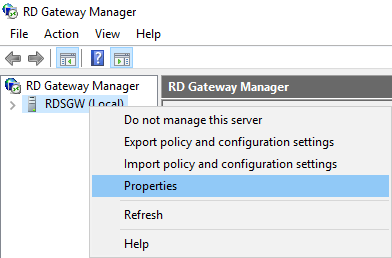
- In the RD Gateway Manager, right-click [Server Name] (Local), and click Properties.
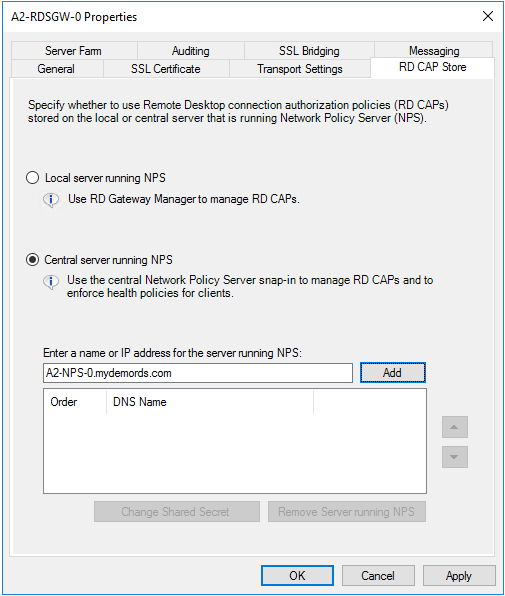
- In the Properties dialog box, select the RD CAP Store
- On the RD CAP Store tab, select Central Server running NPS.
- In the Enter a name or IP address for the server running NPS field, type the IP address or Fully Qualified Domain Name (FQDN) of the NPS server. Click Add.
- In the Shared Secret dialog box, enter a shared secret, and then click OK. Make sure you record this shared secret and store the record securely.
- Click OK to close the RD Gateway Properties dialog box


2. Configure RADIUS client on RD Gateway NPS
You must define an NPS client on the RD Gateway server to allow it to communicate to the NPS server with the NPS extension.
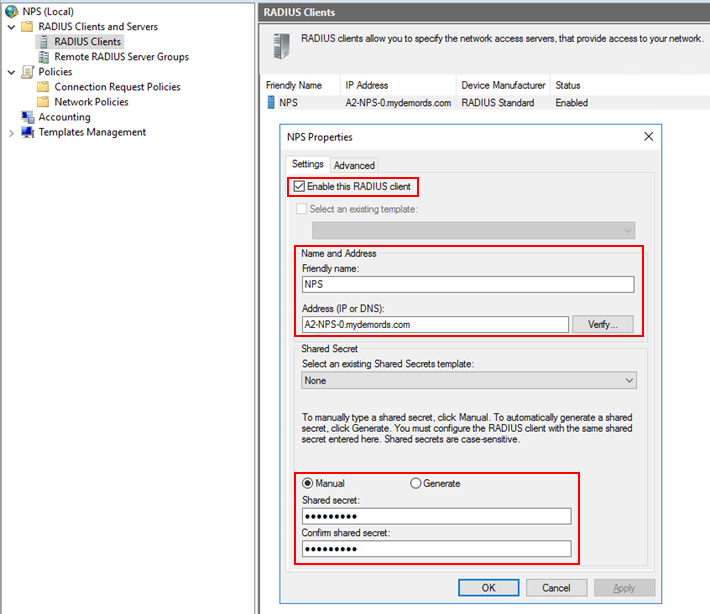
- On the RD Gateway server, in Server Manager, click Tools, and then click Network Policy Server. In the NPS (Local) console, expand RADIUS Clients and Servers, right-click RADIUS Clients, and then click New.
- In the New RADIUS Client dialog box, in the Settings tab, provide a Friendly Name to the client, for example NPS.
- In the Address (IP or DNS) field, type the FQDN of the NPS server, and click Verify. Make sure that the FQDN can be resolved and click OK.
- In the Shared secret field, type the same secret you created previously when configuring the Central CAP Store.
- Click OK.

3. Configure RADIUS timeout value on RD Gateway NPS
To ensure there is time to validate users’ credentials, perform two-step verification, receive responses, respond to RADIUS messages, and if necessary, adjust the RADIUS timeout value.
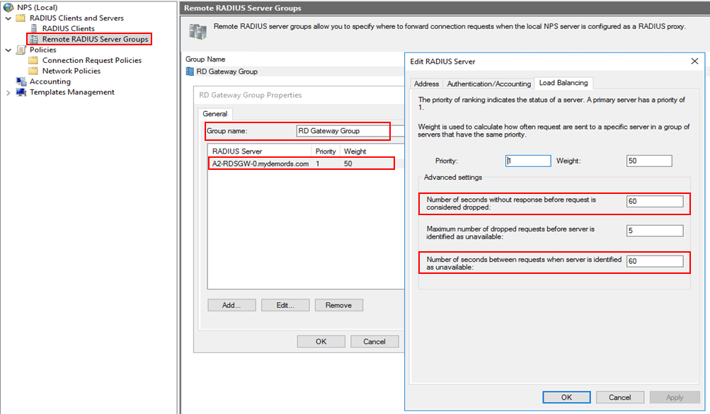
- In the NPS (Local) console, expand RADIUS Clients and Servers, and select Remote RADIUS Server Groups. In the details page, double-click TS GATEWAY SERVER GROUP.
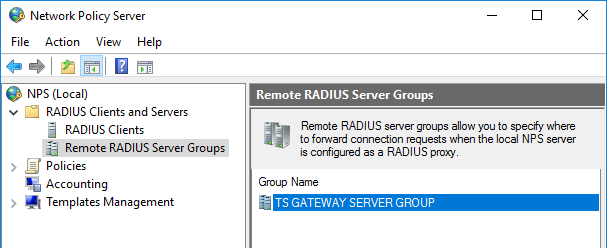
- In the TS GATEWAY SERVER GROUP Properties dialog box, change the Group name to NPS Group.
- In the TS GATEWAY SERVER GROUP Properties dialog box, select the IP address or FQDN of the NPS server that is storing the RD CAPs, and then click Edit.
- In the Edit RADIUS Server dialog box, select the Load Balancing
- In the Load Balancing tab, in the Number of seconds without response before request is considered dropped field, change the default value from 3 to a value equal to or greater than 60 seconds.
- In the Number of seconds between requests when server is identified as unavailable field, change the default value from 30 to a value that is equal to or greater than the value you specified in the previous step.

- Click OK two times to close the dialog boxes.


4. Configure connection request policies
By default, when you configure the RD Gateway to use a central policy store for connection authorization policies, the RD Gateway is configured to forward CAP requests to the NPS server. The NPS server, along with the Azure MFA extension, processes the RADIUS access request. You need to perform the following tasks:
- Create from MFA policy to determine what happens when you receive a request from the NPS server.
- Create to MFA policy to determine when to forward a request to the NPS server
- Disable the default connection request policy.
- Verify policies’ status and processing order.
1. Create “From MFA” connection request policy
- On the RD Gateway, in the NPS (Local) console, expand Policies, right-click Connect Request Policies and select New.
- In the Policy name field, type From MFA.
- In the Type of network access server box, select Remote Desktop Gateway. Then click Next.
- In the Conditions dialog box, click Add…, select Client Friendly Name. Then click Add.
- In the Client Friendly Name dialog box, type the same friendly name you used previously when defining the RADIUS Client on the RD Gateway server. Click OK to close the dialog box, and then click Next.
- In the Authentication settings, make sure you leave the default value of Authenticate requests on this server. Then click Next.
- Click Next two more times to leave all the other settings with their default values. Finally click Finish to create the policy.
- Make sure that the policy details look like the picture below:


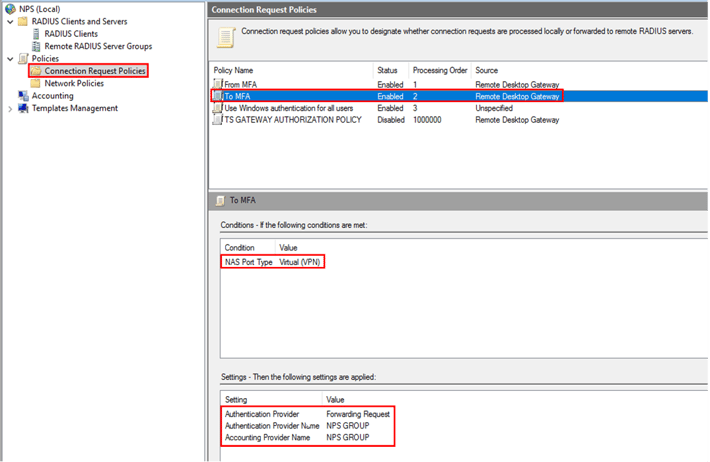
2. Create “To MFA” connection request policy
- On the RD Gateway, in the NPS (Local) console, expand Policies, right-click Connect Request Policies and select New.
- In the Policy name field, type To MFA.
- In the Type of network access server box, select Remote Desktop Gateway. Then click Next.
- In the Conditions dialog box, click Add…, scroll to the bottom and select NAS Port Type. Then click Add.
- In the NAS Port Type dialog box, check Virtual (VPN). Click OK, then click Next.
- In the Authentication settings, select the option Forward request to the following remote RADIUS server group authentication, and select the RADIUS server group available from the list.
- In the Accounting settings, check the option Forward accounting requests to this remote RADIUS server group, and select the RADIUS server group available from the list. Then click Next.
- Click Next to leave the other settings with their default values. Finally click Finish to create the policy.
- Make sure that the policy details look like the picture below:

3. Disable default connection request policy
- On the RD Gateway, in the NPS (Local) console, expand Policies, and select Connection Request Policies.
- Right-click TS GATEWAY AUTHORIZATION POLICY and select Move Down. Repeat as many times as necessary to have the policy at the bottom of the list.
- Right-click TS GATEWAY AUTHORIZATION POLICY and select Disable. If it is already disabled, then leave it that way.
4. Verify connection request policies list
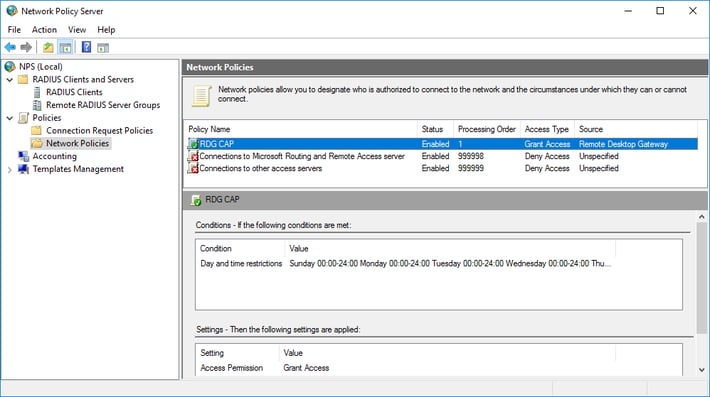
Once you have added the two new policies and disabled the default one, you need to ensure that the policies’ status and processing order are correct. Your policy list should look like the picture below: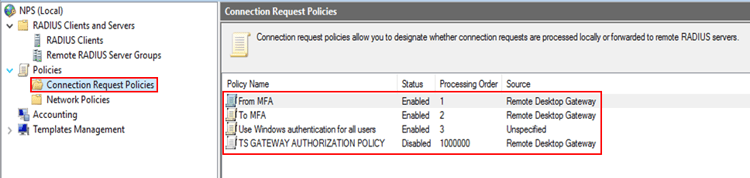
5. Configure NPS service
The NPS server with the NPS extension for Azure needs to be able to exchange messages with the RD Gateway. To enable this message exchange, you need to configure the NPS components on the NPS server.
1. Register server in Active Directory
For the NPS server to function properly in this scenario, it needs to be registered in Active Directory.
- On the NPS server, open Server Manager. Click Tools, then click Network Policy Server.
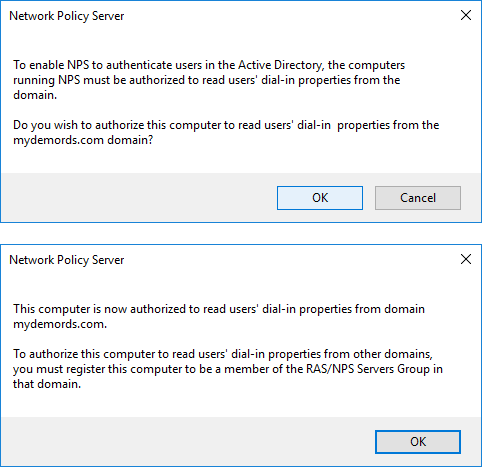
- In the Network Policy Server console, right-click NPS (Local), then click Register server in Active Directory.
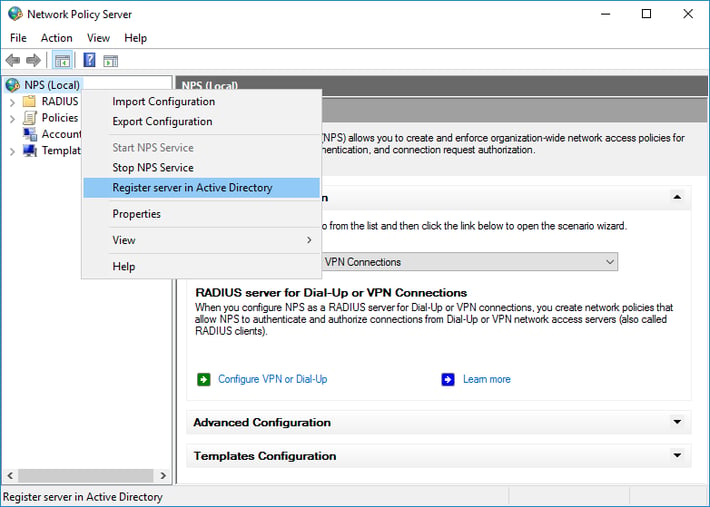
- Click OK two times.


2. Create RADIUS client
The RD Gateway needs to be configured as a RADIUS client to the NPS server.
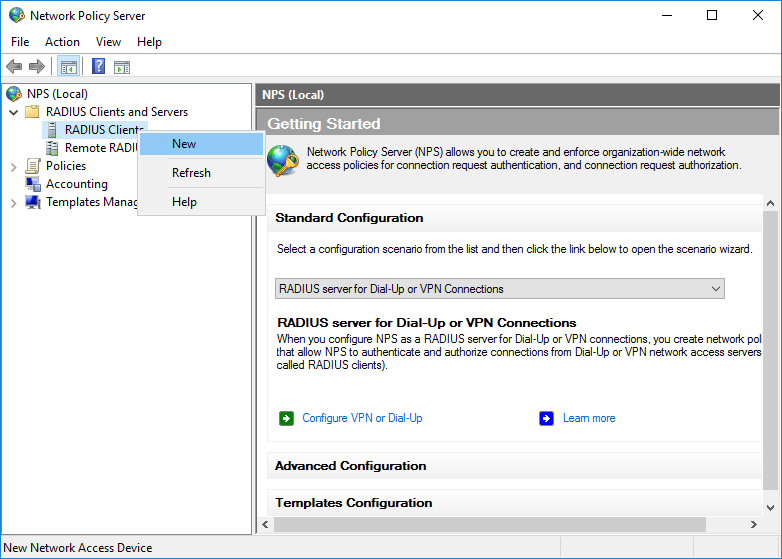
- On the NPS server, in the NPS (Local) console, right-click RADIUS Clients, and click New.
- In the New RADIUS Client dialog box, provide a friendly name, such as RDGW, and the IP address or FQDN of the RD Gateway server.
- In the Shared secret and the Confirm shared secret fields, enter the same secret that you used before when configuring the RD Gateway central store.
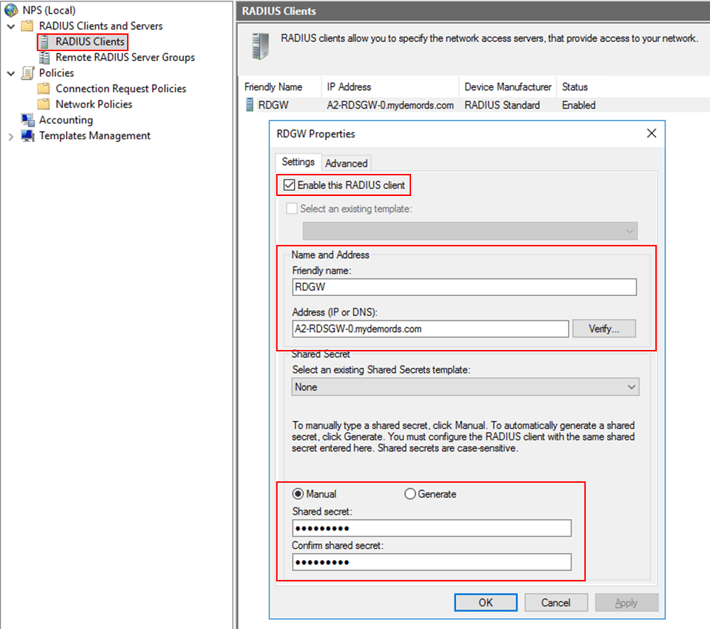
- Click OK to close the dialog box.


3. Create RADIUS server group
You need a RADIUS server group to establish communication with the RD Gateway server.
- On the NPS server, in the NPS (Local) console, right-click Remote RADIUS Server Groups, and click New.
- In the New Remote RADIUS Server Group dialog box, in the Group name field, type a new for the new group, such as RD Gateway Group. Then click Add….
- In the Add RADIUS Server dialog box, type the FQDN for the RD Gateway server, and click Verify…. Make sure that the server name is correct, and click OK.
- Select the newly added RADIUS server, then click Edit.
- In the Load Balancing tab, in the Number of seconds without response before request is considered dropped and Number of seconds between requests when server is identified as unavailable fields, change the default value from 3 to a value equal to or greater than 60 seconds. Make sure to use the same values you set previously when configuring the RADIUS timeout on the RD Gateway server.
- Click OK.

4. Create connection request policies
Just like with the RD Gateway server, you must define policies to handle messaging exchange to/from the RD Gateway server.
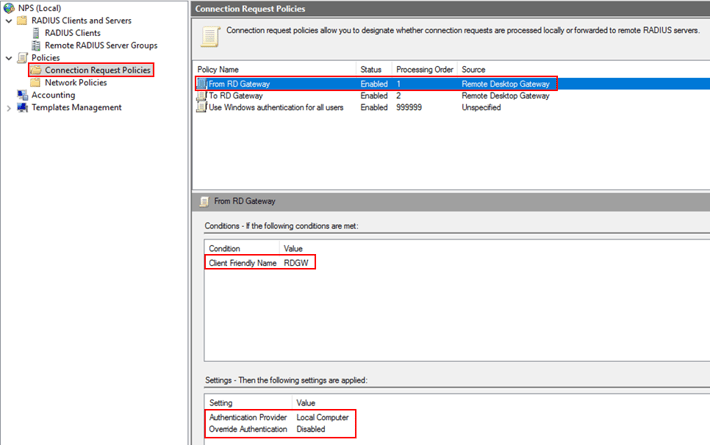
1. Create “From RD Gateway” connection request policy
- On the NPS server, in the NPS (Local) console, expand Policies, right-click Connect Request Policies, and select New.
- In the Policy name field, type From RD Gateway.
- In the Type of network access server box, select Remote Desktop Gateway. Then click Next.
- In the Conditions dialog box, click Add…, select Client Friendly Name. Then click Add.
- In the Client Friendly Name dialog box, type the same friendly name you used previously when defining the RADIUS Client on the NPS server. Click OK to close the dialog box, and then click Next.
- In the Authentication settings, make sure you leave the default value of Authenticate requests on this server. Then click Next.
- Click Next two more times to leave all the other settings with their default values. Finally click Finish to create the policy.
- Make sure that the policy details look like the picture below:

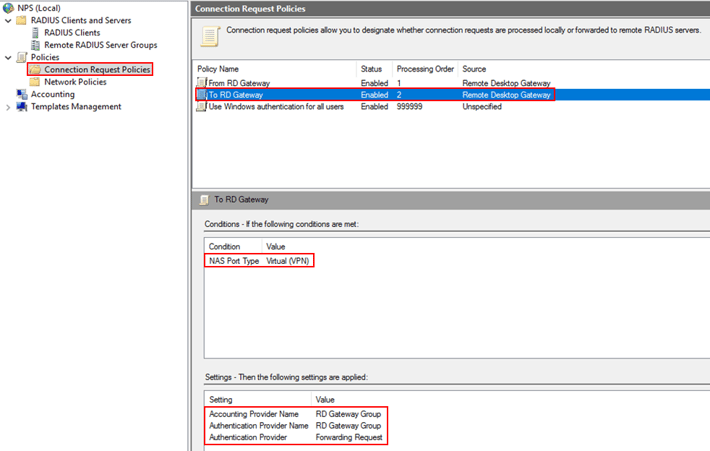
2. Create “To RD Gateway” connection request policy
- On the NPS server, in the NPS (Local) console, expand Policies, right-click Connect Request Policies, and select New.
- In the Policy name field, type To RD Gateway.
- In the Type of network access server box, select Remote Desktop Gateway. Then click Next.
- In the Conditions dialog box, click Add…, scroll to the bottom and select NAS Port Type. Then click Add.
- In the NAS Port Type dialog box, check Virtual (VPN). Click OK, then click Next.
- In the Authentication settings, select the option Forward request to the following remote RADIUS server group authentication, and select the RADIUS server group available from the list.
- In the Accounting settings, check the option Forward accounting requests to this remote RADIUS server group, and select the RADIUS server group available from the list. Then click Next.
- Click Next to leave the other settings with their default values. Finally click Finish to create the policy.
- Make sure that the policy details look like the picture below:

3. Verify connection request policies list
Once you have added the two new policies, you need to ensure that the policies’ status and processing order are correct. Your policy list should look like the picture below: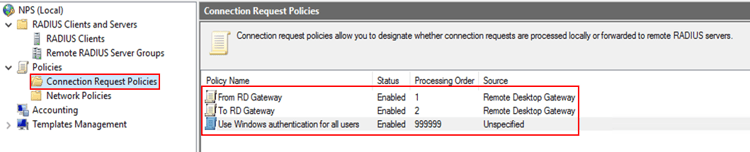
4. Configure Network Policy
Because the NPS server with the MFA extension was designated as the central policy store for RD CAPs, you need to implement a new policy on the NPS server to authorize valid connections requests.
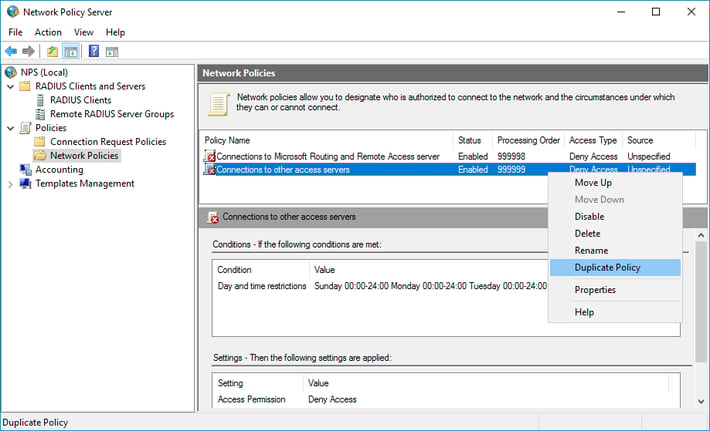
- On the NPS server, in the NPS (Local) console, expand Policies, and click Network Policies.
- Right-click Connection to other access servers, and click Duplicate policy.
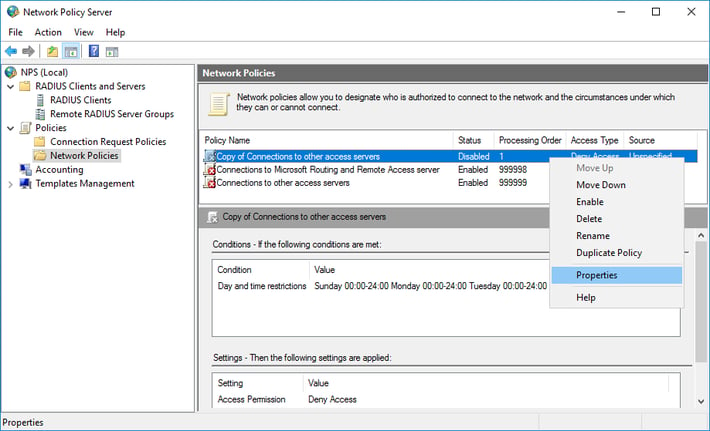
- Right-click Copy of Connections to other access servers and click Properties.
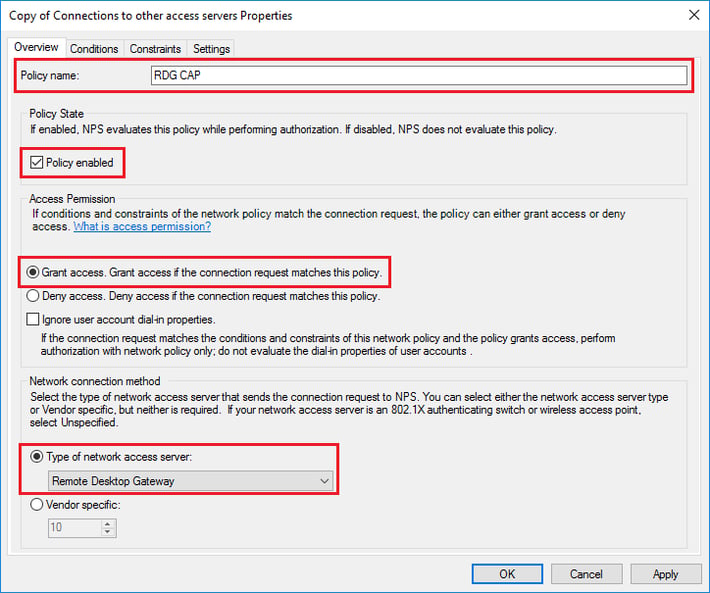
- In the Copy of Connections to other access servers Properties dialog box, in Policy Name, enter a suitable name, such as RDG_CAP. Check Policy Enabled, and select Grant access. Additionally, in Type of network access, select Remote Desktop Gateway.
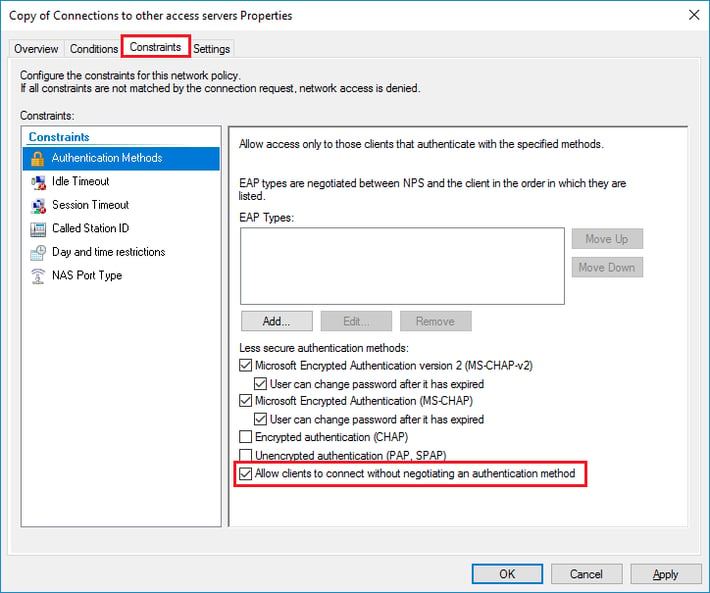
- Click the Constraints tab and check Allow clients to connect without negotiating an authentication method.
- Optionally, click the Conditions tab and add conditions that must be met for the connection to be authorized, for example, membership in a specific Windows group.
- Click OK. When prompted to view the corresponding Help topic, click No.
- Ensure that your new policy is at the top of the list, that the policy is enabled, and that it grants access.


Verify configuration
To verify the configuration, you need to connect to your RD deployment through the RD Gateway server. Be sure to use an account that is allowed by your RD CAP (in case you have set any Conditions to it), and whose MFA settings have been configured already. Click here if you need instructions on how to access your RDS collections.
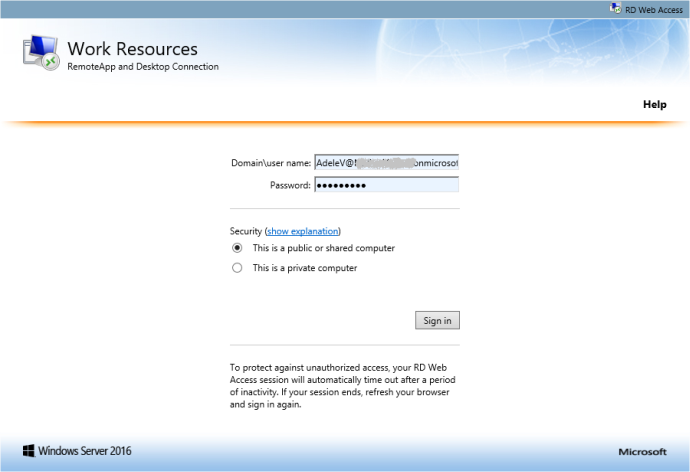
- Log in to your RD web feed.
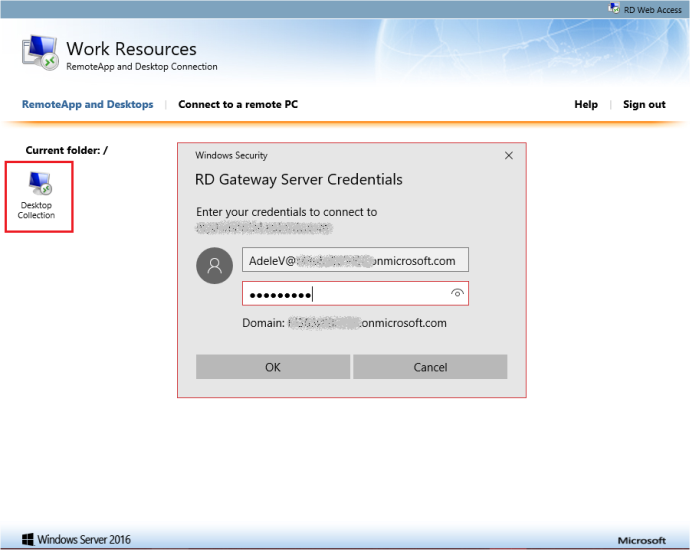
- Open any of the available resources It may ask you to enter your credentials.
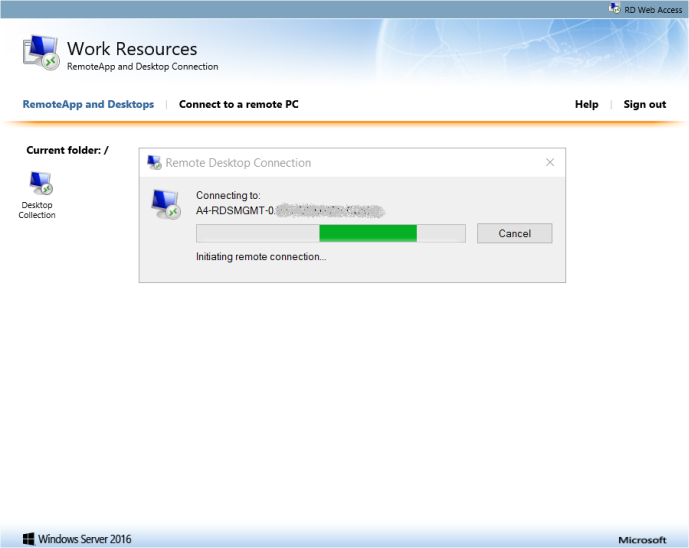
- In this example, the user was configured to use the Azure Authenticator app as secondary authentication step. After a few seconds you should receive a notification on your smartphone asking to approve the connection.
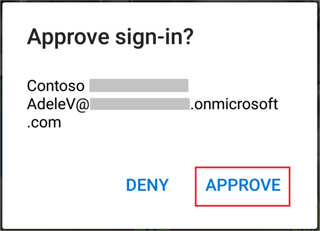
- After granting access, the remote desktop connection should resume.


If you have any additional questions or need assistance, feel free to submit a support ticket by clicking here and our MyCloudIT support team will reach out to you.
Want More Azure Best Practices?